


A good DIY workbench is the heart of any home workshop. These types of workbenches come in handy for all sorts of work. Workbench is more than placing objects but crafting assistant for getting your work done efficiently. But there are many ways you can design a DIY workbench at home and easy to make if you are someone who does frequent crafting or carpentry tasks as well.
Beyond just a flat surface, a nicely designed workbench presents stability for slicing, assembling, and finishing initiatives with precision. The beauty of building your very own workbench is that you can personalize it to your specific needs, area constraints, and the variety of tasks you generally address. This manual will walk you through developing a practical, durable workbench that may not cost a fortune, at the same time as supplying you with the pride of using a device you constructed yourself.
What You Need to Build a Good DIY Workbench
Here are some important things you will need to design a DIY workbench!
1. Materials:
- 4 portions of 4×4″ lumber (30″ long) for legs
- 2 pieces of 2×4″ lumber (48″ Long ) for front and back aprons
- 2 pieces of 2×4″ lumber (24″ Long) for side aprons
- 1 sheet of three/4″ plywood (24″ x 48″ Long) for the top
- 1 piece of one/4″ hardboard (24″ x 48″) for a replaceable surface (elective)
- Box of 2 half of” wooden screws
- Box of 3″ wooden screws
- Wood glue
- Sandpaper (eighty and a hundred and twenty grit)
- Polyurethane finish (elective)
2. Tools:
- Circular noticed or miter noticed
- Drill/driver
- Measuring tape
- Carpenter’s rectangular
- Level
- Clamps
- Orbital Sander (elective however helpful)
- Pencil
- Safety glasses
Step-through-Step Building Process for DIY Workbench
- Cut Your Lumber
- Measure and cut your 4x4s to 30″ period for the legs. Cut your 2x4s to create 48″ portions for the front and back aprons and two 24″ portions for the facet aprons. Cut your plywood to 24″ x 48″ for the benchtop.
- Assemble the Frame
- Position two legs 48″ apart and join them with a 48″ apron, attaching with wooden glue and three” screws.
- Repeat with the opposite legs and 48″ apron to create the again body.
- Connect these two assemblies with the 24″ facet aprons, again the usage of glue and screws.
- Use your woodworker’s rectangular to make certain all corners are 90 levels.
- Add Support
- For more stability, upload go helps among the legs using extra 2x4s.
- Installing a non-obligatory decrease shelf can provide additional storage and in addition, enhance the shape.
- Attach the Top
- Apply timber glue to the top edges of the frame.
- Position your plywood pinnacle and secure it with 2 1/2″ screws, spacing them approximately each 6″.
- If using a hardboard as a sacrificial top layer, attach it with shorter screws.
- Finishing Touches
- Sand all surfaces, beginning with 80 grit and completing with one hundred twenty grit.
- Round any sharp edges for protection.
- Apply polyurethane if desired for durability and moisture resistance.
Pro Tips for Building Your DIY Workbench
Design for Your Space and Needs
Before slicing a single piece of wood, recollect where your DIY workbench needs to be set up and what you may use it for. A woodworking bench would possibly need vises and dog holes, even as an electronics workbench would possibly require integrated retailers and anti-static surfaces.
Prioritize Height for Comfort
The best workbench height is usually at or barely below your knuckles while status with arms comfortable at your sides. For precision work, you may want it barely better; for heavy paintings, slightly decrease.
Don’t Skimp on Stability
There’s not nothing more frustrating than a wobbly workbench. Cross braces, stretchers among legs, and proper leveling are important. Consider adding adjustable feet in case your floor isn’t always perfectly stage.
Think About Mobility
If you would possibly need to transport your bench, recall including heavy-responsibility locking casters. Select ones rated for a minimum of one hundred pounds every, and make sure they lock securely whilst you need the bench desk-bound.
Add Smart Storage
Design your bench together with your tools in your thoughts. Consider adding:
- Pegboard backing for putting equipment
- Shelves below for energy gear
- Drawers for small elements and hand tools
- Magnetic strips for metal equipment
Future-Proof Your Design
Build your bench with the ability to adjust or expand it later. Consider including T-song or bench puppies for clamping, pre-drill holes for possible vise installation, or a design with modular components.
Homemade DIY workbenches at affordable prices
Workbench (H-90cm, D-70cm, L-120cm) with double shelf

This robust workbench features an MDF top with dimensions of 90cm peak, 70cm depth, and 120cm duration. The double-shelf layout affords adequate storage space for tools and substances. Its stable production ensures balance at some stage in work, even as the medium-level fiberboard floor gives a smooth working place for various tasks. Best for sturdy work experience at home or at the garage. Enhance your everyday work experience with this piece today!
Folding Work Table Portable Workbench with Tiltable Platform
This flexible Costway DIY workbench is designed to offer portability with capability. The tiltable platform can be adjusted to seven exclusive levels, adapting to numerous working positions. Its folding layout allows for a smooth storage solution while not in use. Perfect for DIY enthusiasts with limited space, this workbench gives flexibility without compromising on balance. If you are looking for a foldable and multipurpose workbench this is an excellent choice and you cannot go wrong on this one piece.
Woodworking Work Bench with 3 Drawers and 2 Vices
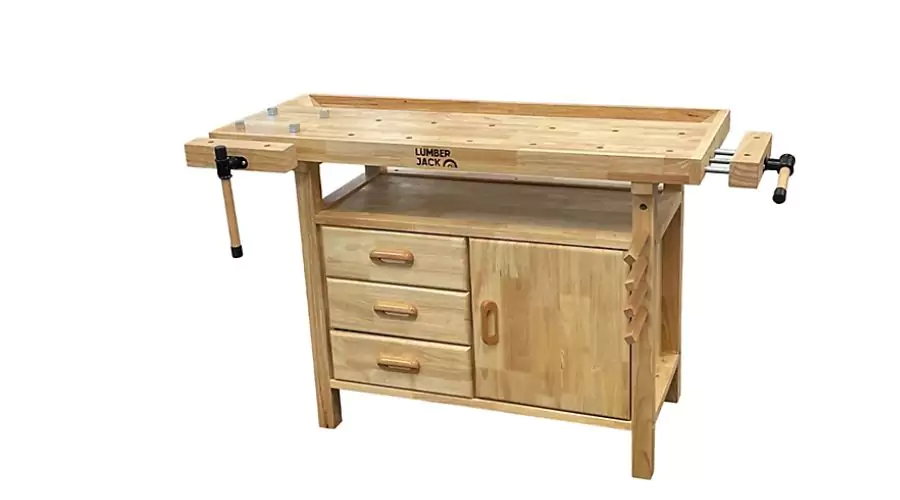
Multipurpose this workbench is simply excellent for use at home. The Lumberjack bench is a woodworker’s dream with its comprehensive storage solutions. Three drawers and an on-board cupboard offer a good storage solution for tools and elements. Two vices offer stable retaining competencies for diverse woodworking duties. Its stable production ensures sturdiness, making it ideal for severe woodworking initiatives.
Ball Bearing Slides Draws and Drawer Dividers Workbench
This expert-grade workbench capability easy ball bearing slides for effortless drawer operation. The blanketed drawer dividers permit for customized employer of equipment and hardware. Built for sturdiness, this heavy-responsibility laptop can take care of stressful projects. Its strong creation affords the stableness wished for precision work. Best for those who often do heavy workloads at home, this workbench can simply boost your productivity.
Conclusion
Building your workbench is greater than just a money-saving challenge—it’s an exercise in planning, measuring, and creating in order to serve as the muse for infinite destiny initiatives. Your custom-built workbench will quickly become the centerpiece of your workshop, tailor-made flawlessly for your space and desires in ways that keep-bought alternatives really can not suit.
As you use your workbench through the years, you’ll likely learn how to improve it—possibly including tool storage, vises, or specialized work surfaces. That’s the splendor of constructing it your self: your workbench can evolve along your abilities and mission requirements. Remember that a workbench is a device itself, no longer a showpiece. If you want professional build DIY workbenches check B&Q’s collections of workbenches today!
If you need more updates about DIY workbenches and how to build a sturdy workbench visit Feedhour today!


