


Is your kitchen looking worn out and outdated? The solution we all need is kitchen cabinet painting. Every once in a while it’s important to do kitchen cabinet painting to make sure your furniture stays fresh and new. With time kitchen cabinets do run dry looking old. You do not want to spend thousands on a full renovation. With a little paint, persistence, and a weekend of work, you may remodel your kitchen cabinets and breathe new life into the heart of your house.


Why do you need Kitchen cabinet painting?
Kitchen renovations are a number of the maximum expensive home improvement projects, with new cabinets frequently being the biggest expense. Painting existing shelves can provide you with a dramatic transformation at a fragment of the value. Plus, you’ll get the satisfaction of completing the undertaking yourself!
Before You Begin: Is Paint the Right Choice?
Before diving in, take into account:
Cabinet cloth: Wood, wooden veneer, and medium-density fiberboard (MDF) take delivery of paint well. Laminate and metallic require unique guidance.
Cabinet situation: Paint can disguise minor imperfections however won’t restore structural problems.
Time funding: kitchen cabinet painting isn’t a one-day assignment. Set apart a long weekend at minimum.
Materials You’ll Need
- Screwdriver (to eliminate doors, drawers, and hardware)
- Drop cloths
- Painter’s tape
- Cleaning answer (TSP works nicely)
- Sandpaper (medium and satisfactory grit)
- Wood filler (for any holes or imperfections)
- Paint primer designed for cabinets
- Paint (semi-gloss or satin finish enamel works fine)
- Quality paintbrushes and small foam rollers
- Paint tray
- Optional: paint sprayer for a smoother end
Step-By Using-Step Guide To Kitchen Cabinet Painting
- Prepare Your Space
First matters first: this can disrupt your kitchen for numerous days. Set up a temporary kitchen region elsewhere if viable. Cover countertops, home equipment, and flooring with drop cloths, and use painter’s tape to shield walls and areas no longer being painted.
- Remove Cabinet Doors, Drawers, and Hardware
Label each door and drawer so don’t forget their unique positions. An easy numbering device works well – use painter’s tape to mark them. Store all hardware in categorized luggage.
- Clean Thoroughly
This step is certainly essential! Kitchens acquire grease and grime which could save your paint from adhering properly. Use a degreasing cleanser like TSP (trisodium phosphate) and observe with a clean water rinse. Allow everything to dry completely.
- Sand All Surfaces
Lightly sand all surfaces to remove the glossy finish and create a floor the primer can grip. You don’t want to sand all the way down to naked wood – simply enough to rough up the floor. Use medium-grit sandpaper, accompanied by great-grit for a smoother end. Wipe away all dirt with a tack fabric.
- Repair Any Damage
Now’s the time to fill holes, dents, or scratches with timber filler. Allow it to dry completely, then sand those regions smooth.
- Apply Primer
A fine primer is essential for an enduring end. Use a primer specially designed for cabinets or one that states it prevents bleed-thru. For darkish cabinets being painted a lighter color, you would possibly need coats of primer. Apply with a broom for inset areas and a foam roller for flat surfaces for the smoothest finish.
- Sand Again (Lightly)
Once the primer is absolutely dry, gently sand with exceptional grit sandpaper to take away any drips or brush marks. Wipe away all dirt before you start your painting on it.
- Paint Your Cabinets
Finally, the transformation starts! Apply the paint in skinny, even coats. Thin coats dry better and offer a smoother end than one thick coat. Most shelves need at least two coats of paint.
Technique subjects here:
- Use a remarkable angled brush for corners, edges, and information
- Use a foam roller on flat surfaces for an easy end
- Follow the grain of the timber
- Allow proper drying time between coats (confer with the paint can instructions)
- Let Everything Dry Completely
Patience is key! Allow the paint to cure consistent with the producer’s instructions before reinstalling the doorways and drawers. This is probably numerous days, but rushing this step can wreck all your hard work.
- Reinstall Hardware and Doors
Reattach the hardware to the doorways and drawers, then reinstall them by using your labeling gadget as a guide. Consider updating your hardware for an additional sparkling look.
Pro Tips for Best Results
- Select awesome paint designed mainly for cabinets or trim. The more value is really worth it for durability.
- Consider a paint with enamel for introduced durability within the kitchen surroundings.
- If you pick out a dramatic coloration alternate, be prepared for in all likelihood desiring extra coats.
- For a manufacturing unit-like end, remember to rent a paint sprayer, however, practice first!
- Work in a nicely ventilated location and recollect carrying a respirator mask.
Essential paints at affordable prices for Kitchen cabinet painting purposes
1. Farrow & Ball Modern Eddy No.301 Matt Emulsion paint, 2.5L
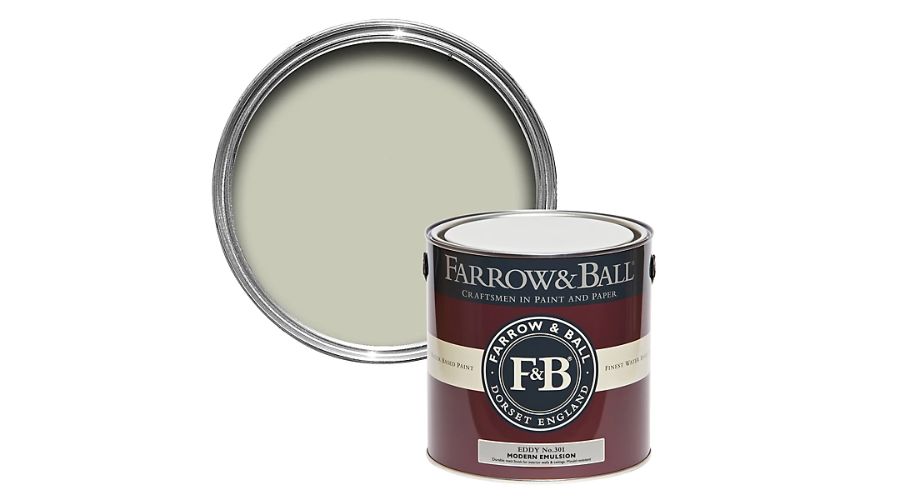
Make your kitchen cabinet painting anew with this Matt Emulsion Paint. It presents a sophisticated depth of shade that transforms shelves into announcement portions. Its chalky matt end conceals floor imperfections at the same time as providing great coverage. The low-VOC components guarantee minimum smell in the course of the software, making it ideal for enclosed kitchen areas. Its remarkable sturdiness resists normal wear, retaining its one-of-a-kind aesthetic appeal for years without compromising on environmental duty, making the Matt Emulsion paint the best paint for cabinets.
2. Farrow & Ball Modern Off white No.3 Matt Emulsion paint, 2.5L
This understated off-white creates an airy, undying appearance that brightens any kitchen space. Its diffused creamy undertones upload warmth without yellowing over time. The top-class pigmentation guarantees brilliant insurance with fewer coats, decreasing labor time drastically. The breathable method prevents moisture buildup below, protecting cabinetry from warping or effervescent. Perfect for growing a smooth, flexible backdrop that enhances any design fashion.
3. PaintNuts Solid Wood Laminated Kitchen Units Cupboard Cabinet Door Satin Paint – Cream – 250ml
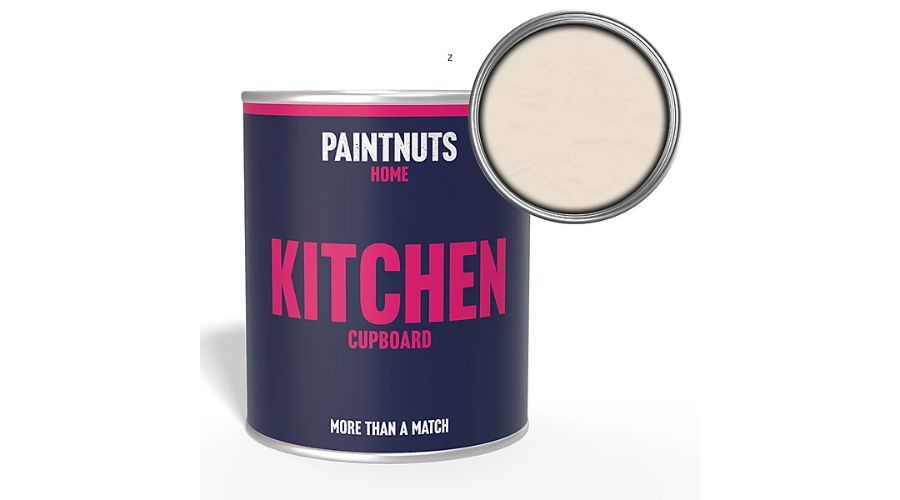
Specifically formulated for kitchen shelves, this specialized satin cream finish moves the proper balance between shine and subtlety. Its advanced self-leveling properties dispose of brush marks for a professional end. The robust formula resists grease, moisture, and frequent cleaning—essential for kitchen environments. Superior adhesion manner is minimal practice required, even on laminated surfaces. The heat cream tone creates an inviting, conventional kitchen aesthetic making it ideal for kitchen cabinet painting projects.
4. PaintNuts Solid Wood Laminated Kitchen Units Cupboard Cabinet Door Gloss Paint – Pigeon Blue – 1L
This stunning pigeon blue gloss paint can provide a dramatic effect with a reflective end that complements cabinet dimensions. Its specialized formulation bonds distinctly nicely to more than one surface, consisting of wood and laminate. The high-gloss end creates a wipe-smooth floor that withstands cooking splashes and common cleansing. The rich, one-of-a-kind coloration adds character to kitchens, while the long-lasting method maintains its vivid look through years of everyday use. Enhance your kitchen cabinet painting experience with this Door Gloss Paint!
Conclusion
Kitchen cabinet painting is indeed time-consuming however particularly worthwhile. The dramatic before-and-after results could make your kitchen appearance modern for simply the fee of substances and a weekend of work. The key to achievement is proper coaching and staying power through each step. Have you painted your kitchen cabinets? If you are also looking for an affordable innovative investment check out B&Q to shop for the best paints for kitchen cabinets without spending much.
To know more about kitchen cabinet painting visit Feedhour.


